Add a Newsletter Signup to Shopify: Section, Footer, Forms

To add a newsletter signup to Shopify, open your theme in the editor, click + Add section on the template you want and choose Newsletter. Every Online Store 2.0 theme and the Horizon family has either that section or a newsletter form in the footer. If your theme has neither, the free Shopify Forms app or an email marketing app adds one.
Add the Newsletter section
The steps follow Shopify’s Help Center page on adding a newsletter signup, read on October 23, 2026.
- In the Shopify admin, go to Online Store.
- Next to the theme you want to change, click Edit theme.
- From the dropdown at the top, choose the template that should carry the form, such as the home page or a page you made for the signup.
- Click + Add section and select Newsletter.
- Choose a color system from the dropdown to preview it.
- Optional: select Full width so the background color runs across the whole page.
- Click the header, paragraph or email form block to change its text and settings.
- Click Save.
The section comes with three blocks: a header, a paragraph and the email form. On a screen wider than 1600 pixels the editing options sit on the right of the editor, and on a smaller one on the left, which is worth knowing when the panel seems to be missing.
We would add it twice: once on the home page, below the first screen, and once on a dedicated page you can link from emails, social profiles and the order status page. A signup on a page of its own gives you a URL to share, and the home page section catches visitors who were never sent anywhere.
If Newsletter isn’t in the section list, your theme may offer the signup as a content block inside another section instead. Shopify’s advice at that point is the theme’s own documentation.
Use the footer signup
Themes that don’t have the section put the form in the footer, which appears on every page. In the theme editor, click the footer and look for the email signup setting or block; the exact name depends on the theme, and Shopify’s page describes the footer option only in general terms. A footer form needs no template choice, so it is the fastest of the three options. In our view it is also the easiest to miss at the bottom of a long page, so we would pair it with the section.
Use a Shopify Forms form instead
Shopify Forms is a free app that builds inline forms (placed on a page) and popup forms (floating over it). It goes further than the theme section. A form can ask for email, SMS or WhatsApp consent, collect extra fields, attach a new or existing discount as a sign-up reward, tag customers so you can build segments, trigger an automation, and email you on each submission.
To set up a popup form:
- In Online Store > Edit theme, click the App embeds icon, turn on Forms and click Save. Popup forms need this embed; inline forms need it too, plus a compatible theme.
- Go to Apps > Forms, click Create form, choose Popup form, name it and click Create.
- Choose Floating or Overlay, then work through the Teaser, Form, Success, Styling, Image and Behavior settings.
- Preview it and click Turn form on. New forms start as Inactive.
A store can have up to 25 forms, without multi-step forms or conditional logic. When an existing customer submits a form with a different email or phone number, the customer record keeps the old one, and marketing consent might not update either, so test new forms with an address that isn’t already a customer.
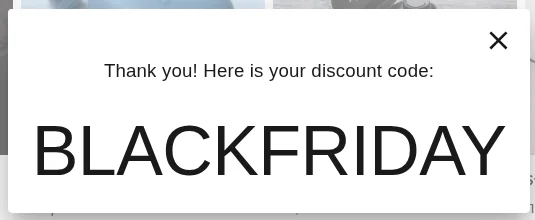
Pick Forms over the theme section when you want a discount for signing up, more fields than an email address, or a popup. If you want a popup that trades a discount code for an email address and nothing else, our Pop Up Discount app does that, and Shopify email popups walks through it.
Where the signups go
Addresses from a newsletter signup are stored in the Email subscribers customer segment on the Customers page. That segment lists only customers who agreed to email marketing, and you can create your own segments of customers who accept email marketing.
The newsletter form isn’t the only way in. Shopify’s customer contact information page lists two more: a consent checkbox at checkout and an opt-in when customers sign in to their account, both set under Settings > Checkout in Marketing opt-in. If your store is in Germany, a Require customers to confirm their subscription option in the Email marketing part of Settings > Notifications adds a confirmation step, and customers who don’t confirm aren’t included in your marketing.
To send anything you need a sending tool: Shopify Messaging, or an email marketing app that syncs your Shopify customers. Send promotional content only to customers who agreed to receive it, which is the rule Shopify’s page sets out. The tactics for filling the list from all these places are in grow your Shopify email list.
Write the paragraph block
The paragraph block is where the form makes its promise. Say what a subscriber gets and how often. “One email a month with new arrivals and restock news” works because a visitor can judge it before typing an address. Then keep the promise in the first email, which is the job of a welcome email series. Other guides on lists and popups are in the email and popups hub.
FAQ
Why don’t I see a Newsletter section in my theme? Some themes offer the signup as a block inside another section or in the footer instead of a standalone section. Check your theme’s documentation, or add a form with Shopify Forms or an email app.
Where do newsletter signups appear in Shopify? Signups appear on the Customers page, in the default Email subscribers segment.
Do I need an app to send the newsletter? The signup form needs no app on a compatible theme, but sending needs a tool: Shopify Messaging or an email marketing app.
Can I add a discount for signing up? Shopify Forms lets you attach a new or existing discount to a form, so a signup can carry an incentive.